Amigurumi Dog Bark Free Crochet Pattern
Facebook group: Amigurumi Free Patterns
Materials:
Yarn for the body, legs: Alize Burcum Batik 100% acrylic, 210 m / 100 g, color 3379. For knitting the second dog (bright multi-colored, with green, purple and other stripes) I used Alize Burcum Cizgi 210 m / 100 g, color 2986;
muzzle yarn: Alize Burcum klasik 100% acrylic, 210 m / 100 g, color 55 white;
yarn for ears and tail: Plush Vita Fancy 100% polyester, 100 m / 50 g, color 5315 yellow;
yarn for a nose: Vita Cotton Charm 100% cotton, 106 m / 50 g, color 4152 black;
filler for toys. I use holofiber balls;
eyes on a secure mount (on the leg). Size: 4 * 2.2 cm. You can use any others at your discretion;
hooks No. 3,5 and 2,5;
blunt needle for stitching parts;
Crystal Moment glue.
Abbreviations:
sc – single crochet
hdc – half double crochet
(1 sc, inc) * 6 – repeat 6 times what is written in brackets, if indicated * 2 – repeat 2 times, * 3 – 3 times, etc.
inc – increase, knit 2 single crochet in one loop
dec – decrease, knit 2 stitches together with a single crochet
dec * 4 – make 4 decreases in a row (dec * 2 – 2 decreases, etc.)
Now let’s start knitting. We will crochet No. 3,5 tightly enough.
PATTERN
Head-to-body:
1.6 sc into magic ring
2. inc * 6 = 12
3. (1 sc, inc) * 6 = 18
4. (2 sc, inc) * 6 = 24
5. (3 sc, inc) * 6 = 30
6. (2 sc, inc, 2 sc) * 6 = 36
7. (5 sc, inc) * 6 = 42
8. (3 sc, inc, 3 sc) * 6 = 48
9-18. 48 sc (10 rows)
Insert the eyes between 10 and 11 rows. Slowly we stuff the detail of the toy in the process of knitting.
* If you use the same eyes as mine, then, in addition to the main attachment, in addition to the back of the eye, you need to apply glue and stick them directly to the head (do not apply glue close to the edges so that it does not leak out of the eyes), then they will fit snugly and will not move.
19. (3 sc, dec, 3 sc) * 6 = 42
20. (5 sc, dec) * 6 = 36
21. (2 sc, dec, 2 sc) * 6 = 30
22. (3 sc, dec) * 6 = 24
23. (2 sc, dec) * 6 = 18
24-25. 18 sc (2 rows)
26. (2 sc, inc) * 6 = 24
27.24 sc
28. (3 sc, inc) * 6 = 30
29.30 sc
30. (2 sc, inc, 2 sc) * 6 = 36
31-33. 36 sc (3 rows)
34. (11 sc, inc) * 3 = 39
35. (6 sc, inc, 6 sc) * 3 = 42
36-42. 42 sc (7 rows)
43. (5 sc, dec) * 6 = 36
44. (2 sc, dec, 2 sc) * 6 = 30
45. (3 sc, dec) * 6 = 24
46. (2 sc, dec) * 6 = 18
47. (1 sc, dec) * 6 = 12
48. dec * 6 = 6 sc, cut the thread, leaving a small tip, thread it into every second sc, tighten the hole, fasten the thread.
Upper legs (2 parts):
1.6 sc into magic ring
2.inc * 6 = 12 sc
3. (1 sc, inc) * 6 = 18
4. (2 sc, inc) * 6 = 24
5-8. 24 sc (4 rows)
9. (4 sc, dec) * 4 = 20
10. (8 sc, dec) * 2 = 18
11-14. 18 sc (4 rows)
15. (7 sc, dec) * 2 = 16
16-17. 16 sc (2 rows)
18. (6 sc, dec) * 2 = 14
19-23. 14 sc (5 rows)
24. (5 sc, dec) * 2 = 12
25.12 sc
We fill it with 2/3 filler, there should not be filler in the top of the foot.
26. dec * 6 = 6 sc, cut the thread, leaving a small tip, thread it into every second sc, tighten the hole, fasten the thread.
Having tied the second foot, leave the thread to sew both feet to the body.
Lower legs (2 parts):
We collect 5 air loops and start knitting in 2 loops from the hook (in the diagram this is a loop under the number 4).
1. (3 sc, 3 sc in one loop) * 2 = 12
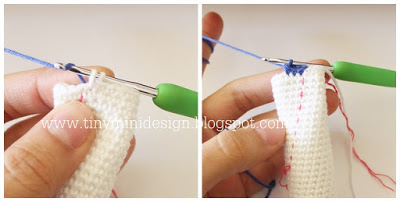
We make the second increase of 3 loops into 5 loops, into its back wall, focus on the diagram, this loop will be from the side and tight, you can take a smaller hook for convenience.
* Mark the beginning of the row with a marker or thread of a different color so as not to get confused. We knit tightly.
2. (3 sc, inc, 1 sc, inc) * 2 = 16
3. (3 sc, inc, 3 sc, inc) * 2 = 20
4. (3 sc, inc, 5sc, inc) * 2 = 24
5. (3 sc, inc, 3 sc, inc, 3 sc, inc) * 2 = 30
6. (3 sc, inc, 3 sc, inc, 2 sc, inc, 3 sc, inc) * 2 = 38
7-9. 38 sc
* When decreasing in the next 3 rows, use a smaller hook, for example 2.5. Try to knit the decreases tightly, so that later when you fill the filler, you will not see large holes in the places of the decreases. If nevertheless it cannot be accurately knitted, then later, when the part is tied, you can additionally stitch these holes with the same yarn.
10.5 sc, dec * 7, 19 sc = 31
11.4 sc, dec * 4, 10 sc, dec * 2, 5 sc = 25
12. 4 sc, all 4 decreases of the previous row decrease together 1 decrease, 17 sc = 22
13-14. 22 sc (2 rows)
15.1 sc, dec, 4 sc, dec, 13 sc = 20
16-17. 20 sc
18.4 sc, dec, 8 sc, dec, 4 sc = 18
19-23. 18 sc (5 rows)
24. (1 sc, dec) * 6 = 12
25. dec * 6 = 6, cut the thread, leaving a small tip, thread it into every second sc, tighten the hole, fasten the thread.
After tying the second leg, leave the thread to sew both legs to the body.
Spout:
Take the hook number 2.5. We use black Vita Cotton Charm yarn. The beginning of knitting is similar to the lower legs. We collect 9 air loops and start knitting in 2 loops from the hook. We knit tightly so that there are no holes.
1. (7 sc, 3 sc in one loop) * 2 = 20
The second increase of 3 loops is done in the 7 loop, into its back wall, focus on the scheme, this loop will be from the side and tight, you can take a smaller hook for convenience.
2. (7 sc, inc, 1 sc, inc) * 2 = 24
3. (7 sc, inc, 3 sc, inc) * 2 = 28
4. (7 sc, inc, 5 sc, inc) * 2 = 32
5.2 sc, 16 hdc, 4 sc = 32
6. (7 sc, dec, 5 sc, dec) * 2 = 28
7. (7 sc, dec, 3 sc, dec) * 2 = 24
8. (7 sc, dec, 1 sc, dec) * 2 = 20
9. (7 sc, decrease 3 loops with one decrease) * 2 = 16
Trim the thread, leaving enough to sew the hole in the part, sew the nose to the muzzle, make dots on the muzzle and make 2 wraps around it. About 50 cm. It is better to take with a margin and sew everything with one thread, rather than several pieces. When stitching the nozzle hole, fill the part with filler.
Muzzle:
We use white yarn. The beginning of knitting is similar to the lower legs and nose.
We collect 16 air loops and start knitting in 2 loops from the hook. We knit tightly so that there are no holes.
1. (14 sc, 3 sc in one loop) * 2 = 34
We make the second increase of 3 loops into a 14 loop, into its back wall, focus on the diagram that was higher, this loop will be from the side and tight, you can take a smaller hook for convenience.
2. (14 sc, inc, 1 sc, inc) * 2 = 38
3. (14 sc, inc, 3 sc, inc) * 2 = 42
4. (14 sc, inc, 2 sc, inc, 2 sc, inc) * 2 = 48
5. (14 sc, inc, 8 sc, inc) * 2 = 52
6-7. 52 sc
8. (14 sc, dec, 8 sc, dec) * 2 = 48
9. (14 sc, dec, 2 sc, dec, 2 sc, dec) * 2 = 42
10. (14 sc, dec, 3 sc, dec) * 2 = 38
11. (14 sc, dec, 1sc, dec) * 2 = 34
12. (14 sc, decrease 3 loops with one decrease) * 2 = 30
We cut the thread, leaving enough to sew up the hole and sew the muzzle to the head. When the hole is half sewn, we begin to fill the part with filler. We look at the photo, which shows which place the muzzle does not need to be filled, leave it empty, neatly distributing the filler along the edges of the part. On this empty place we will have a nose. Sew the hole to the end.
Ears:
For ears we use yellow fantasy Vita soft Plush yarn. Hook number 3,5, we knit freely, the yarn is shaggy, you can not make tight loops. When knitting from this yarn, loops are practically invisible, be sure to use a marker or a piece of thread of a different color to mark the beginning of the row.
* You can use 2 markers: one for the beginning of the row, the other for the middle of the row, so there will be no errors in the number of loops. For example, we need to knit 30 loops, we knit from the beginning to the marker, which is in the middle, 15 loops, from it to the end of the row, where the second marker, another 15 loops. It’s easier to navigate. This is for those who have difficulty knitting from this yarn. If something is connected wrong, dissolve the knitting in one loop, hooking its crown to the top.
* This yarn in the knitted part looks good from the inside, so we will use the wrong side as the front side.
* If you cannot tighten the amigurumi ring from this yarn, instead of the ring you can knit 2 air loops and start knitting in the first loop.
1.6 sc into magic ring
2. inc * 6 = 12
3. (1 sc, inc) * 6 = 18
4. (2 sc, inc) * 6 = 24
5. (3 sc, inc) * 6 = 30
6-14. 30 sc (9 rows)
15. (3 sc, dec) * 6 = 24
16-17. 24 sc (2 rows)
We turn the part inside out, now it will be our front one, and continue knitting from the inside (counterclockwise).
18. (2 sc, dec) * 6 = 18
19-22. 18 sc (4 rows)
Fold the part in half and knit 8 sc, leave the tail to sew the ear to the head. We do not stuff ears with a filler.
Tail:
For the tail we use the same yarn as for the ears, Vita soft Plush.
1.6 sc into magic ring
2. inc * 6 = 12
3. (1 sc, inc) * 6 = 18
4-6. 18 sc (3 rows)
7. (4 sc, dec) * 3 = 15
We cut the thread, leave a small tail for sewing the tail to the body.
Mouth:
We use the yarn that knitted the body, Alize Burcum Batik.
1.6 sc into magic ring
2. inc * 6 = 12
3. (1 sc, inc) * 6 = 18
4.18 sc
We cut the thread, leave a small tail for sewing the mouth to the head. We add the part in half, we don’t need to fill it, we will just sew the mouth under the white muzzle.
Now let’s get down to the face design.
We take the nose (the side where the half-crochets went with us should be near the eyes), now the thread from the nose moves away from the edge, we will move it a bit: with the help of a needle or hook we remove the thread from the back from the middle of the nose.
Then we put the nose to the muzzle, in the place where there was no filler, we make a couple of twists in the middle of the white muzzle, forming the muzzle, as in the photo.
Then we sew the nose to the muzzle, stitching it through, in this place, under the nose, it should be as flat as possible. Embroider black dots. Done.
This is how all the details of the toy look together (plus the mouth):
Now we sew the muzzle and the back of the nose to the head. The white muzzle should be located at a distance of two rows from the eyes, the nose is located directly under the eyes, end to end. From below we have a mouth, we sew it both to the head and to the muzzle. Sew the ears between 5 and 6 rows. We attach the tail to the ass, filling it with a little filler.
We connect the paws to the body with the help of a thread fastener, you can make a button fastener, or just sew it so that the toy is static, does not move the paws. With the place of attachment of the paws, we focus on the photo.
Decorate the dog as you wish. I tied a chain of air loops and hung a small pendant on it.
That’s all. Our toy is ready! Congratulations 🙂 Sizes of the finished toy using the same yarn: sitting 20 cm, standing 28 cm.
If someone had difficulties in the knitting process, questions, comments, wishes or saw inaccuracies in the master class, you can write me in personal messages at the Masters Fair.


