Amigurumi Little Bunny Free Crochet Pattern
Material used:
1. Plush yarn (Himalaya Dolphin Baby color 80335 or
analogues) – 2 skeins
A little white plush yarn (for eyes and a tooth)
2. A little black, blue and pink yarn (YarnArt Jeans),
for nose, mouth and pupils.
3. A suitable size hook (I used 3.5)
4. Marker for loops.
5. Needle and floss (or strong thread) for stitching parts
6. Filler (holofiber, syntepuh)
7. Good mood,
Terms;
sc> single crochet
inc> increase
dec> decrease
Ch> chain
Blo> knitting from the loop
Flo> knitting from the front loop
SL-ST> slip-stitch
Body:
1 row: 6 sc into magic ring
2 row: 6 inc (12)
3 row: (sc, inc) x6 (18)
4 row: (sc, inc, sc) x6 (24)
5 row: (3 sc, inc) x6 (30)
6 row: (2 sc, inc, 2 sc) x6 (36)
7 row: (inc, 5 sc) x6 (42)
8 row: (3 sc, inc, 3 sc) x6 (48)
9 row: (7 sc, inc) x6 (54)
10 row: (4 sc, inc, 4 sc) x6 (60)
11 row: (9 sc, inc) x6 (66)
12 row: (5 sc, inc, 5 sc) x6 (72)
13-23 row: no change 72sc.
24 row: (5 sc, dec, 5 sc) x6 (66)
25 row: (9 sc, dec) x6 (60)
26 row: (4 sc, dec, 4 sc) x6 (54)
27 row: (7 sc, dec) x6 (48)
28 row: (3 sc, dec, 3 sc) x6 (42)
29 row: (dec, 5 sc) x6 (36)
30 row: (2 sc, dec, 2 sc) x6 (30)
We start stuffing the body with holofiber
31 row: (3 sc, dec) x6 (24)
32 row: (sc, dec, sc) x6 (18)
33 row: (sc, dec) x6 (12)
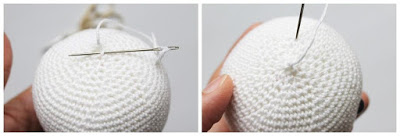
34 row: 6 dec (6)
Fasten the thread, cut. Hide the end.
Ears (2 parts):
1 row: 6 sc into magic ring
2 row: 6 inc (12)
3 row: (1sc., Inc) x6 (18)
4 row: (2sc., Inc) x6 (24)
5 row: (3sc., Inc) x6 (30)
6-10 row: unchanged 30sc.
11 row: (dec, 13sc) x2 (28)
12 row: (dec, 12sc) x2 (26)
13 row: (dec, 11sc) x2 (24)
14 row: (dec, 10sc) x2 (22)
15 row: (dec, 9sc) x2 (20)
16 row: (dec, 8sc) x2 (18)
17 row: (dec, 7sc) x2 (16)
18 row: (dec, 6sc) x2 (14)
19-23 row: unchanged 14 sc. Cut the thread, slightly stuff the ears with filler and sew
in a circle to the top of the head.
Handles (2 parts):
1 row: 6 sc into magic ring
2 row: 6 inc (12)
3 row: (1sc., Inc) x6 (18)
4-6 row: unchanged 18 sc.
7 row: 3 dec, 12 sc. (fifteen)
Fill the handle with filler (bottom only).
8 row: 2 dec, 11 sc. (thirteen)
9 row: 1 dec, 11 sc. (12)
10 row: no change 12 sc.
Fold in half and knit 5 sc.
Sew to the body, guided by the photo (see below)
Feet (2 parts):
Dial 6 ch
1 row: from 2 from the hook of the loop 4sc, 3sc into 1 loop, turn the knitting over and continue
3 sc, inc (12)
2 row: inc, 3sc, 3inc, 3sc, 2inc (18)
3 row: 1sc, inc, 3sc, (1sc, inc) X3, 3sc. (1sc, inc) x2 (24)
4 row: 2sc, inc, 3sc, (2sc, inc) X3, 3sc. (2sc, inc) x2 (30)
5 row: 3sc, inc, 3sc, (3sc, inc) X3, 3sc. (3sc, inc) x2 (36)
6 row: we knit for the back half-loop of the previous row 36 sc.
7-8 row: unchanged 36 sc.
9 row: 10 sc, 8 dec, 10 sc. (28)
10 row: 10 sc, 4 dec, 10 sc. (24)
11-12 row unchanged 24 sc.
Fill tightly.
We cut the thread and sew in a circle the legs to the body.
Left eye:
Right eye:
Knit in white.
Dial 6 ch
1 row: from 2 from the hook of the loop 4sc, 3sc into 1 loop, turn the knitting over and continue
3 sc, inc (12)
2 row: inc, 3sc, 3inc, 3sc, 2inc (18)
3 row: 1sc, inc, 3sc, (1sc, inc) X3, 3sc. (1sc, inc) x2 (24)
4 row: 1 sc, 1sl-st (connecting column) we cut the thread.
Knit in white.
Dial 6 ch
1 row: from 2 from the hook of the loop 4sc, 3sc into 1 loop, turn the knitting over and continue
3 sc, inc (12)
2 row: inc, 3sc, 3inc, 3sc, 2inc (18)
3 row: 1sc, inc, 3sc, (1sc, inc) X3, 3sc. (1sc, inc) x2 (24)
4 row: 2sc, inc, 3sc, (2sc, inc) X3, 3sc. (2sc, inc) x2 (30)
5 row: 1 sc, 1sl-st (connecting column) we cut the thread.
Pupils (2 parts):
Knit with black thread:
1 row: 6 sc into magic ring
2 row: 6 inc (12)
3 row: 1 sl-st (connecting column)
We cut the thread leaving a long tail for sewing to the white part of the eye.
Spout:
Tail:
Knit with a pink thread:
1 row: 6 sc into magic ring
2 row: 6 inc (12)
3 row: (sc, inc) x6 (18)
4-5 row: unchanged 18 sc.
6 row: (sc, dec) x6 (12) fill with filler
We cut the thread leaving a long tail for sewing to
Body
1 row: 6 sc into magic ring
2 row: 6 inc (12)
3 row: (sc, inc) x6 (18)
4-5 row: unchanged 18 sc.
6 row: (sc, dec) x6 (12) fill with filler
We cut the thread leaving a long tail for sewing to the body.
Based on the photo, we sew
Ears, handles, legs, eyes, tail,
nose.
Sew the pupils to the eyes and then
only to the body.
We embroider a mouth and eyebrows.
You can leave it like this or embroider a tooth
(a couple of stitches of white plush yarn, and
divided by black thread)
That’s all your baby is ready)
You can love ..
Play…
In a dream, hug!)
Do not forget to show off the work in
album:


